
Keep your crafting fresh and think outside the box when coming up with new projects, like using any round frame and fabric scraps to DIY wall art.
Inspiration is everywhere. It’s a phrase we hear a lot and it’s one I’ll say a lot on this site, because it’s true. When you look around, really look around, you can see all sorts of possibilities.
I love scrolling through Pinterest or looking at crafting websites as much as the next crafty person. I was never into crafting growing up and came into it much later in life though. For a long time, even still, I get that imposter syndrome feeling. Who am I to be coming up with my own ideas? Maybe I should just stay in my lane and make what I see others making.
After all, there’s nothing wrong with that. Following project tutorials is a great way to learn and make some really cute projects for yourself and your friends and family. I’ll still do that, but one day I was rooting around in this amazing store (The Painted Mermaid in Southport) and something caught my eye. I knew I wanted to repurpose it into something pretty. I knew I could DIY some wall art.
Shifting into the next gear for cute DIY wall art
I saw this whole bin of plastic gears. I have no idea what they were used for, but I immediately thought of the embroidery hoop project I learned from My Designs in The Chaos.
I knew the gear wouldn’t be big enough to do exactly the same thing, but I also knew I could adapt what I had learned and make something different.
The How To for this DIY wall art project
This DIY wall art project is really simple.
At first I thought I would just glue the fabric to the inside of the gear. But then I worried about how I would do that and keep it taut all the way around. I mean, maybe if I had another 5 hands that would work.
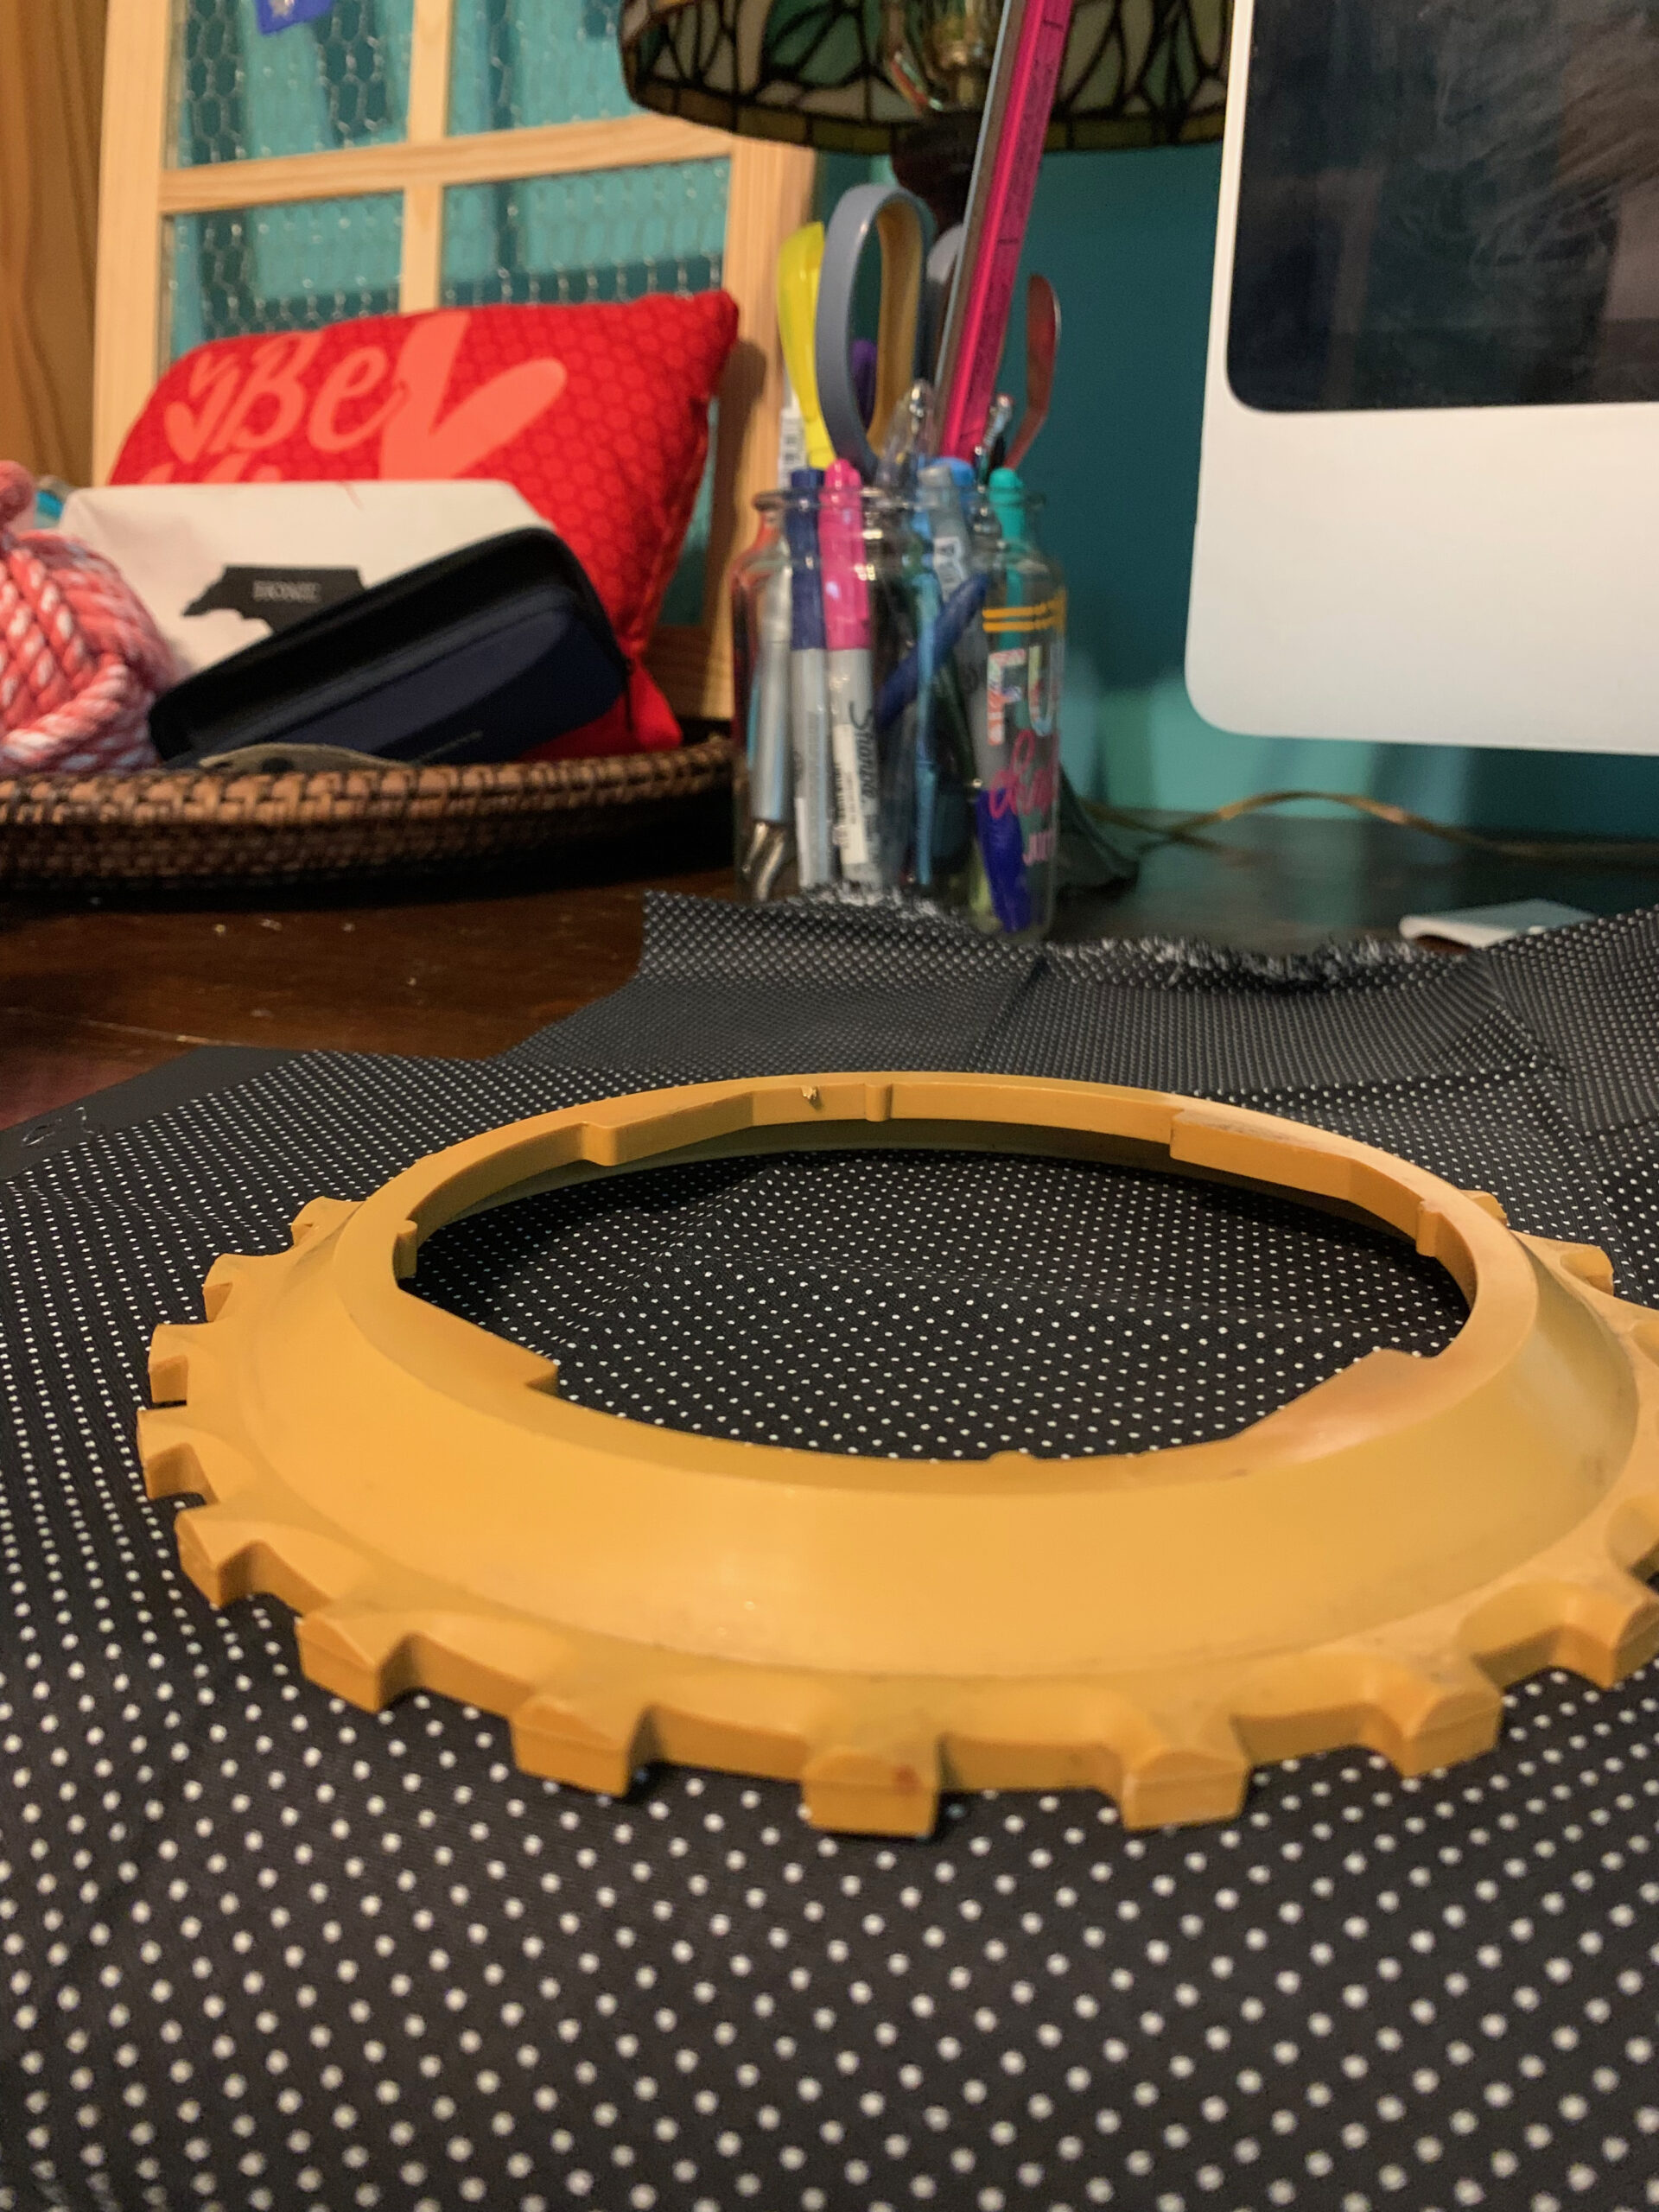
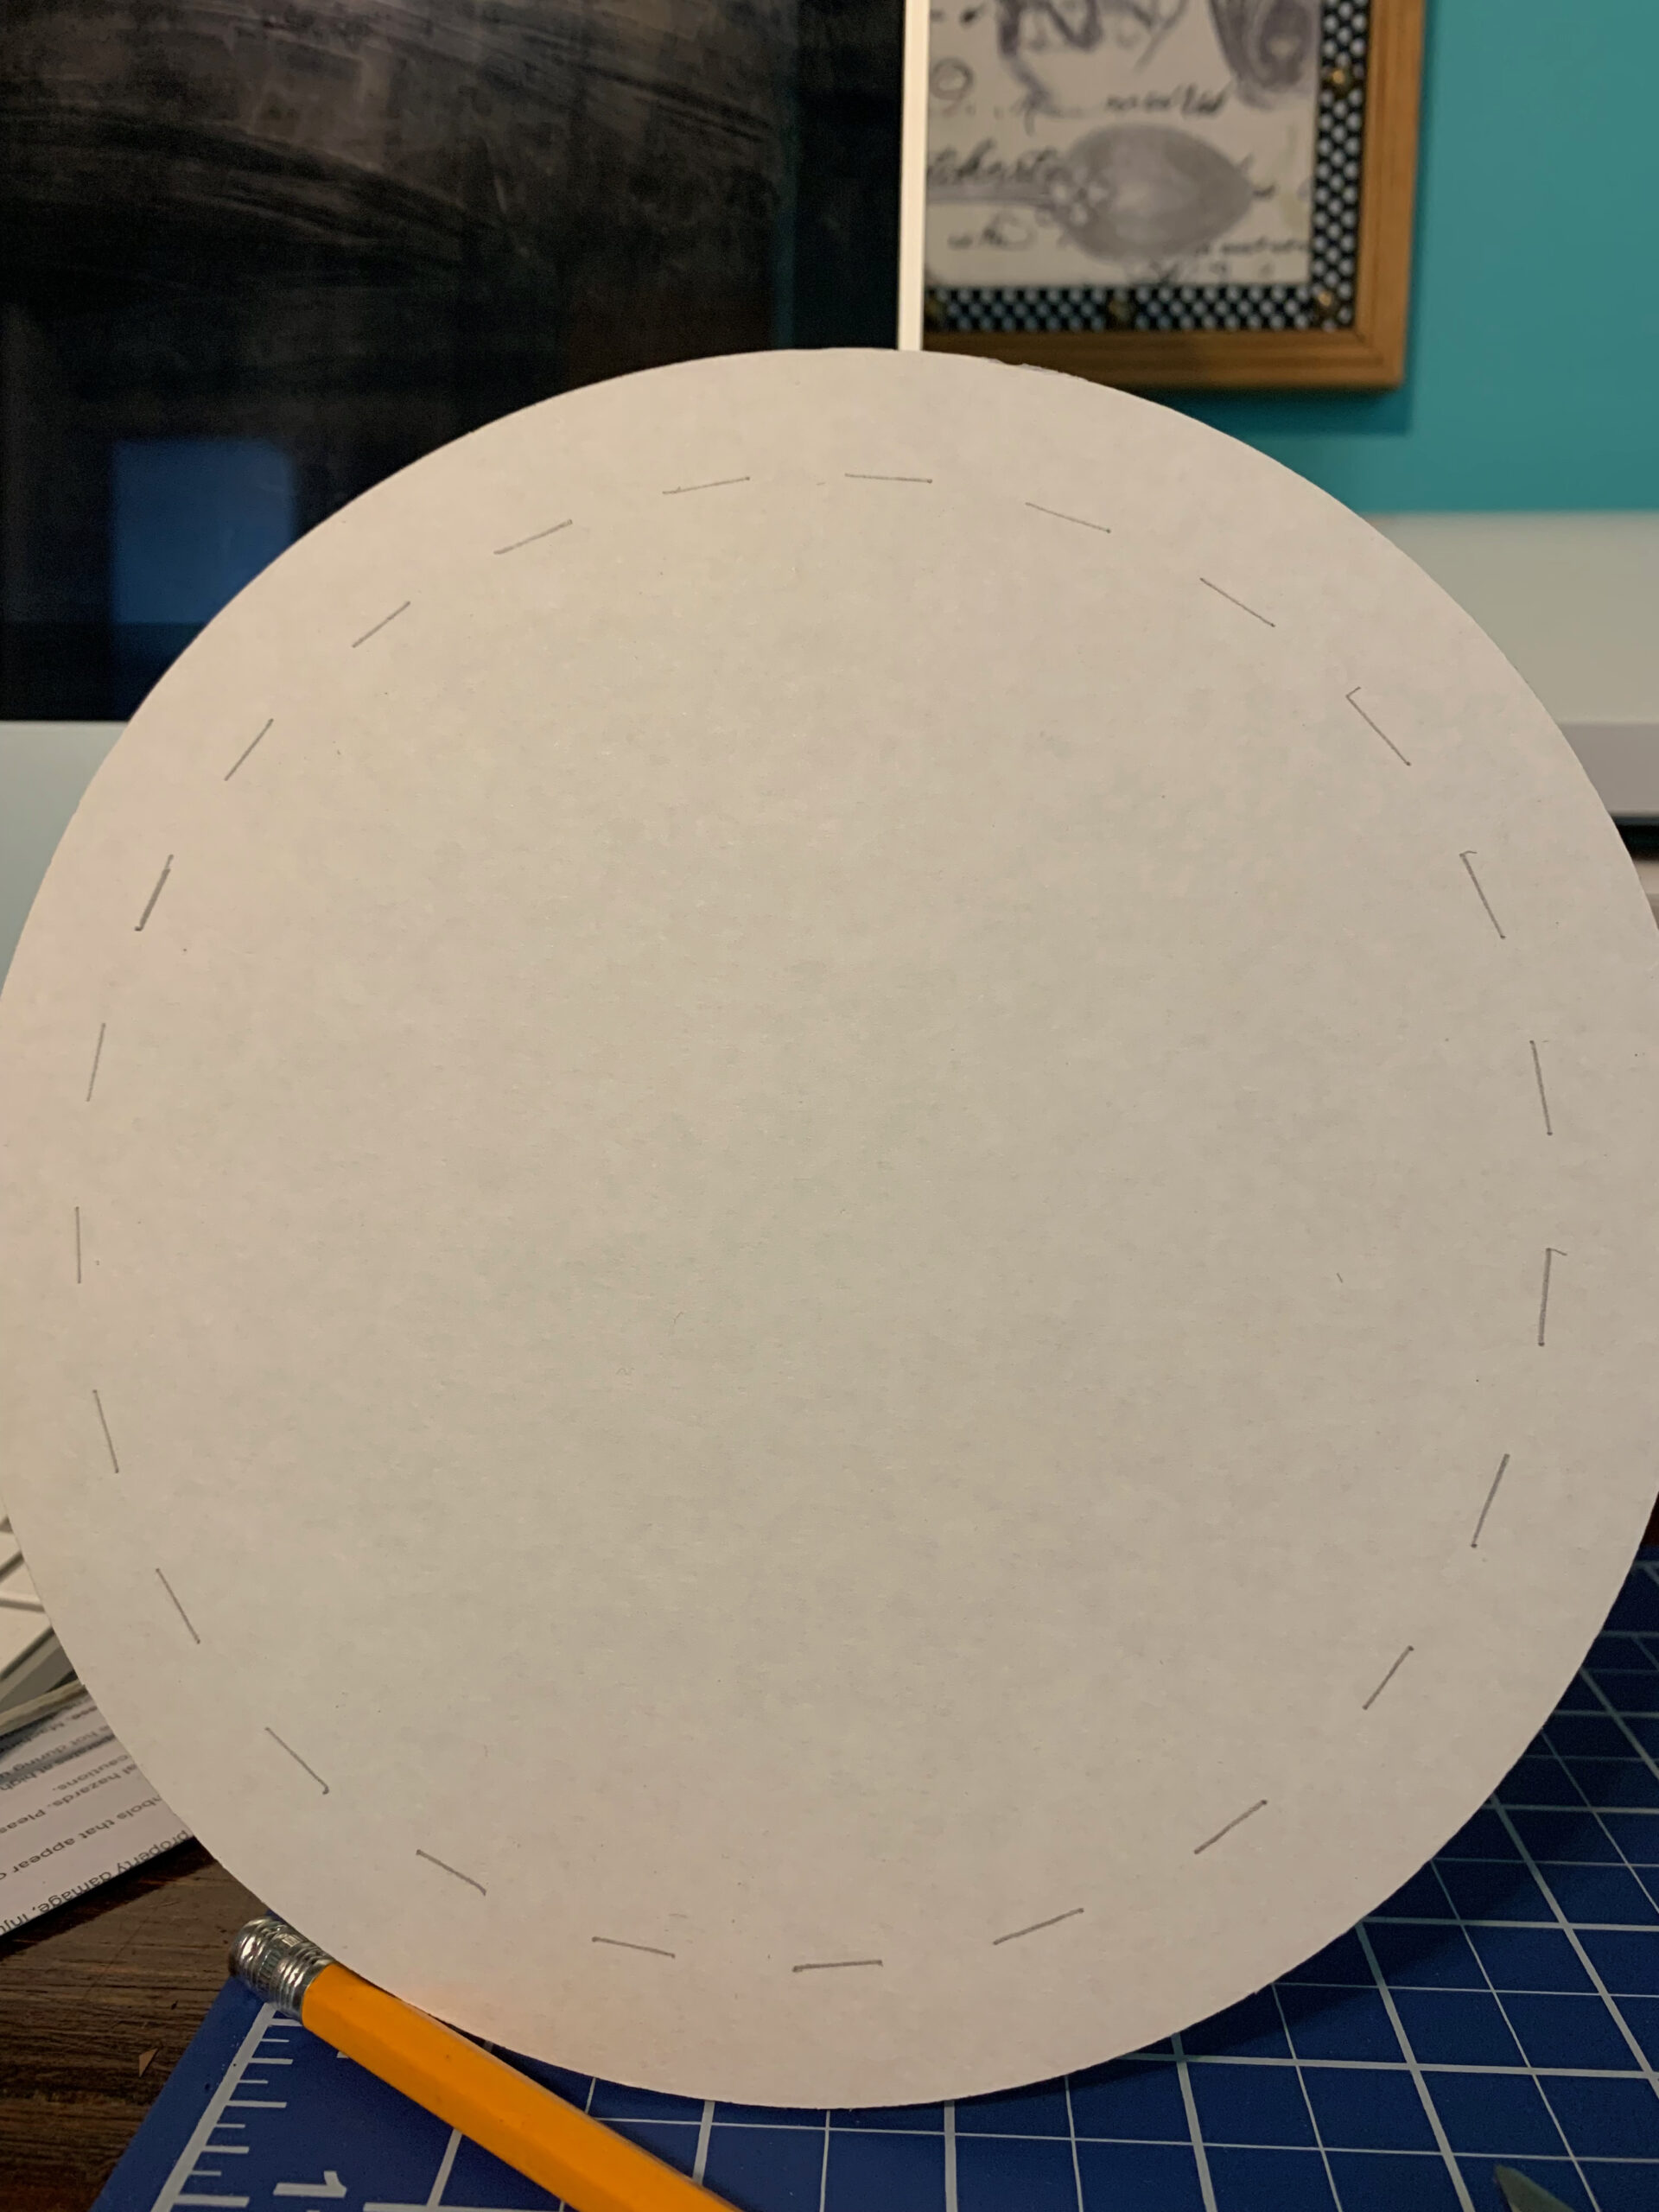
Then I decided to use a piece of cardboard for a backing. I just traced the inside of the gear and cut out a piece from a cardboard box. It took just a little extra trimming to make it fit. Luckily it didn’t have to be perfect, since it is the back and would be covered with fabric anyway.
Then I used the cardboard circle as a template to cut out a piece of fabric, making sure the fabric was a bit bigger all around.
Making your own letters
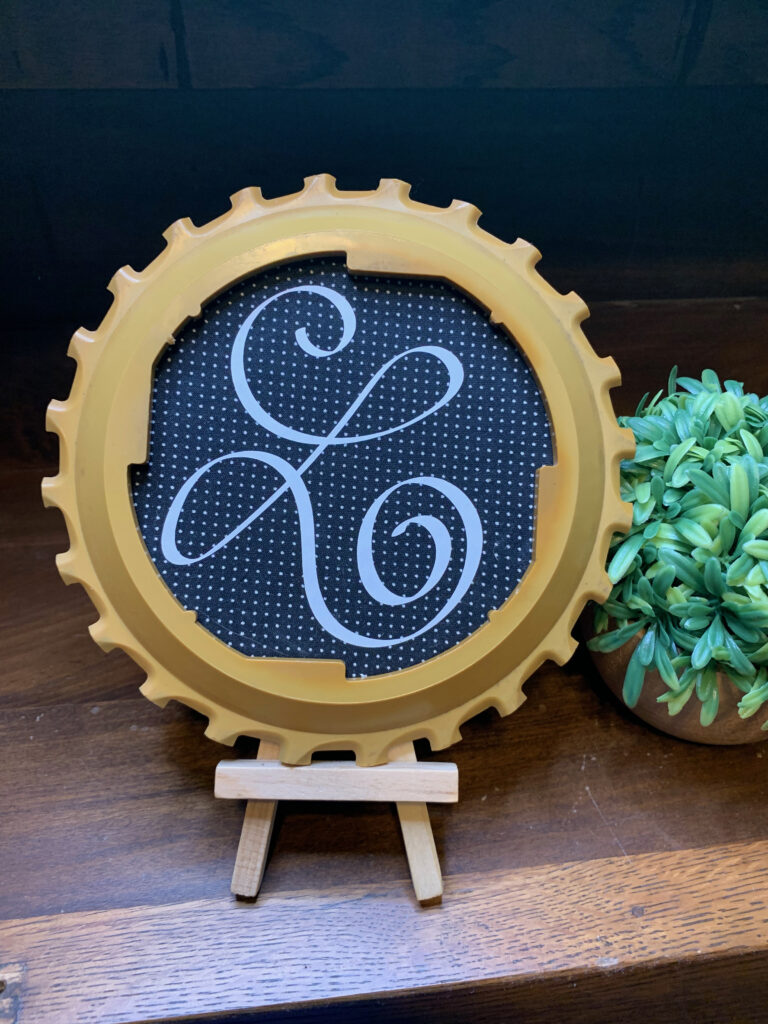
If you use Adobe Illustrator on an iPad, there’s this thing called the smoothness tool. What a game changer! With the smoothness tool turned all the way up, I can use the paintbrush and draw my own cursive letters, which I did here with the cursive “L.”
White heat transfer vinyl was just the thing to coordinate with the black and white polka dot fabric I used, and black and white look great with the mustard-colored gear. I cut it out with my Silhouette Cameo 3 and weeded the design. (I even remembered to mirror the image!).
Location, location, location
I thought about how best to place this and decided to put in the middle as best I could. I used my Cricut Mini Heat Press and sealed the vinyl to the fabric. I knew I couldn’t use the heat press once the fabric was on the cardboard, so I did it before attaching the fabric.
Then I used craft glue and sealed it down all over the cardboard circle. I waited for it to dry. Waiting is not my best thing, so I decided to work on an svg design while it dried.
When it was completely dry, I put the circle into the gear and rotated it around until it was where I wanted it. Then I used some hot glue around the inside walls of the frame of the gear and tucked in my fabric circle, holding it down until the glue dried.
I haven’t hung it yet, but I could totally add a bow, or just use some twine to make a hanger. Or I might just use a command strip. I took it back to The Painter Mermaid to show Amy, and she loved it. I will definitely look for more items there that I can give a new life with a little help from my crafty side.
Other ideas for wall art projects
So here it is in a nutshell. Find some round thing, whether it’s an embroidery hoop, a small bike tire frame, anything round, or square, or rectangular. Anything that catches your eye. Then pick out a beautiful fabric to coordinate and add a design. Do you fancy a little classic literature with a sarcastic edge? Check out these saucy Shakespeare sayings. Or if the beach is more your vibe, a lighthouse monogram frame may be be perfect. And if you’re dying to get away, look no further than Key West or the Outer Banks.
Pingback: Making signs and home decor - Harbor33Designs